Yes, Sifter can connect to Slack.
You can connect your Sifter account to Slack so that you and your team can add issues to Sifter directly from Slack. You can also configure notifications to post to specific Slack channels to help everyone stay up-to-date.
If you were already using Sifter's old Slack integration (which was just for notifications on a per-project basis), you'll want to connect to Slack using the new method described below, then reconfigure those notifications. There's a section at the end of this document on how to do that.
Connect Sifter Account to Slack Workspace
First, let's connect your Sifter account to Slack. You'll need to do this before you set up any notifications, by the way.
Click Settings in the main nav.
Go to the Account tab.
Click the Add to Slack button and follow the prompts to connect (you'll need to be logged into the Slack workspace that you want to connect).
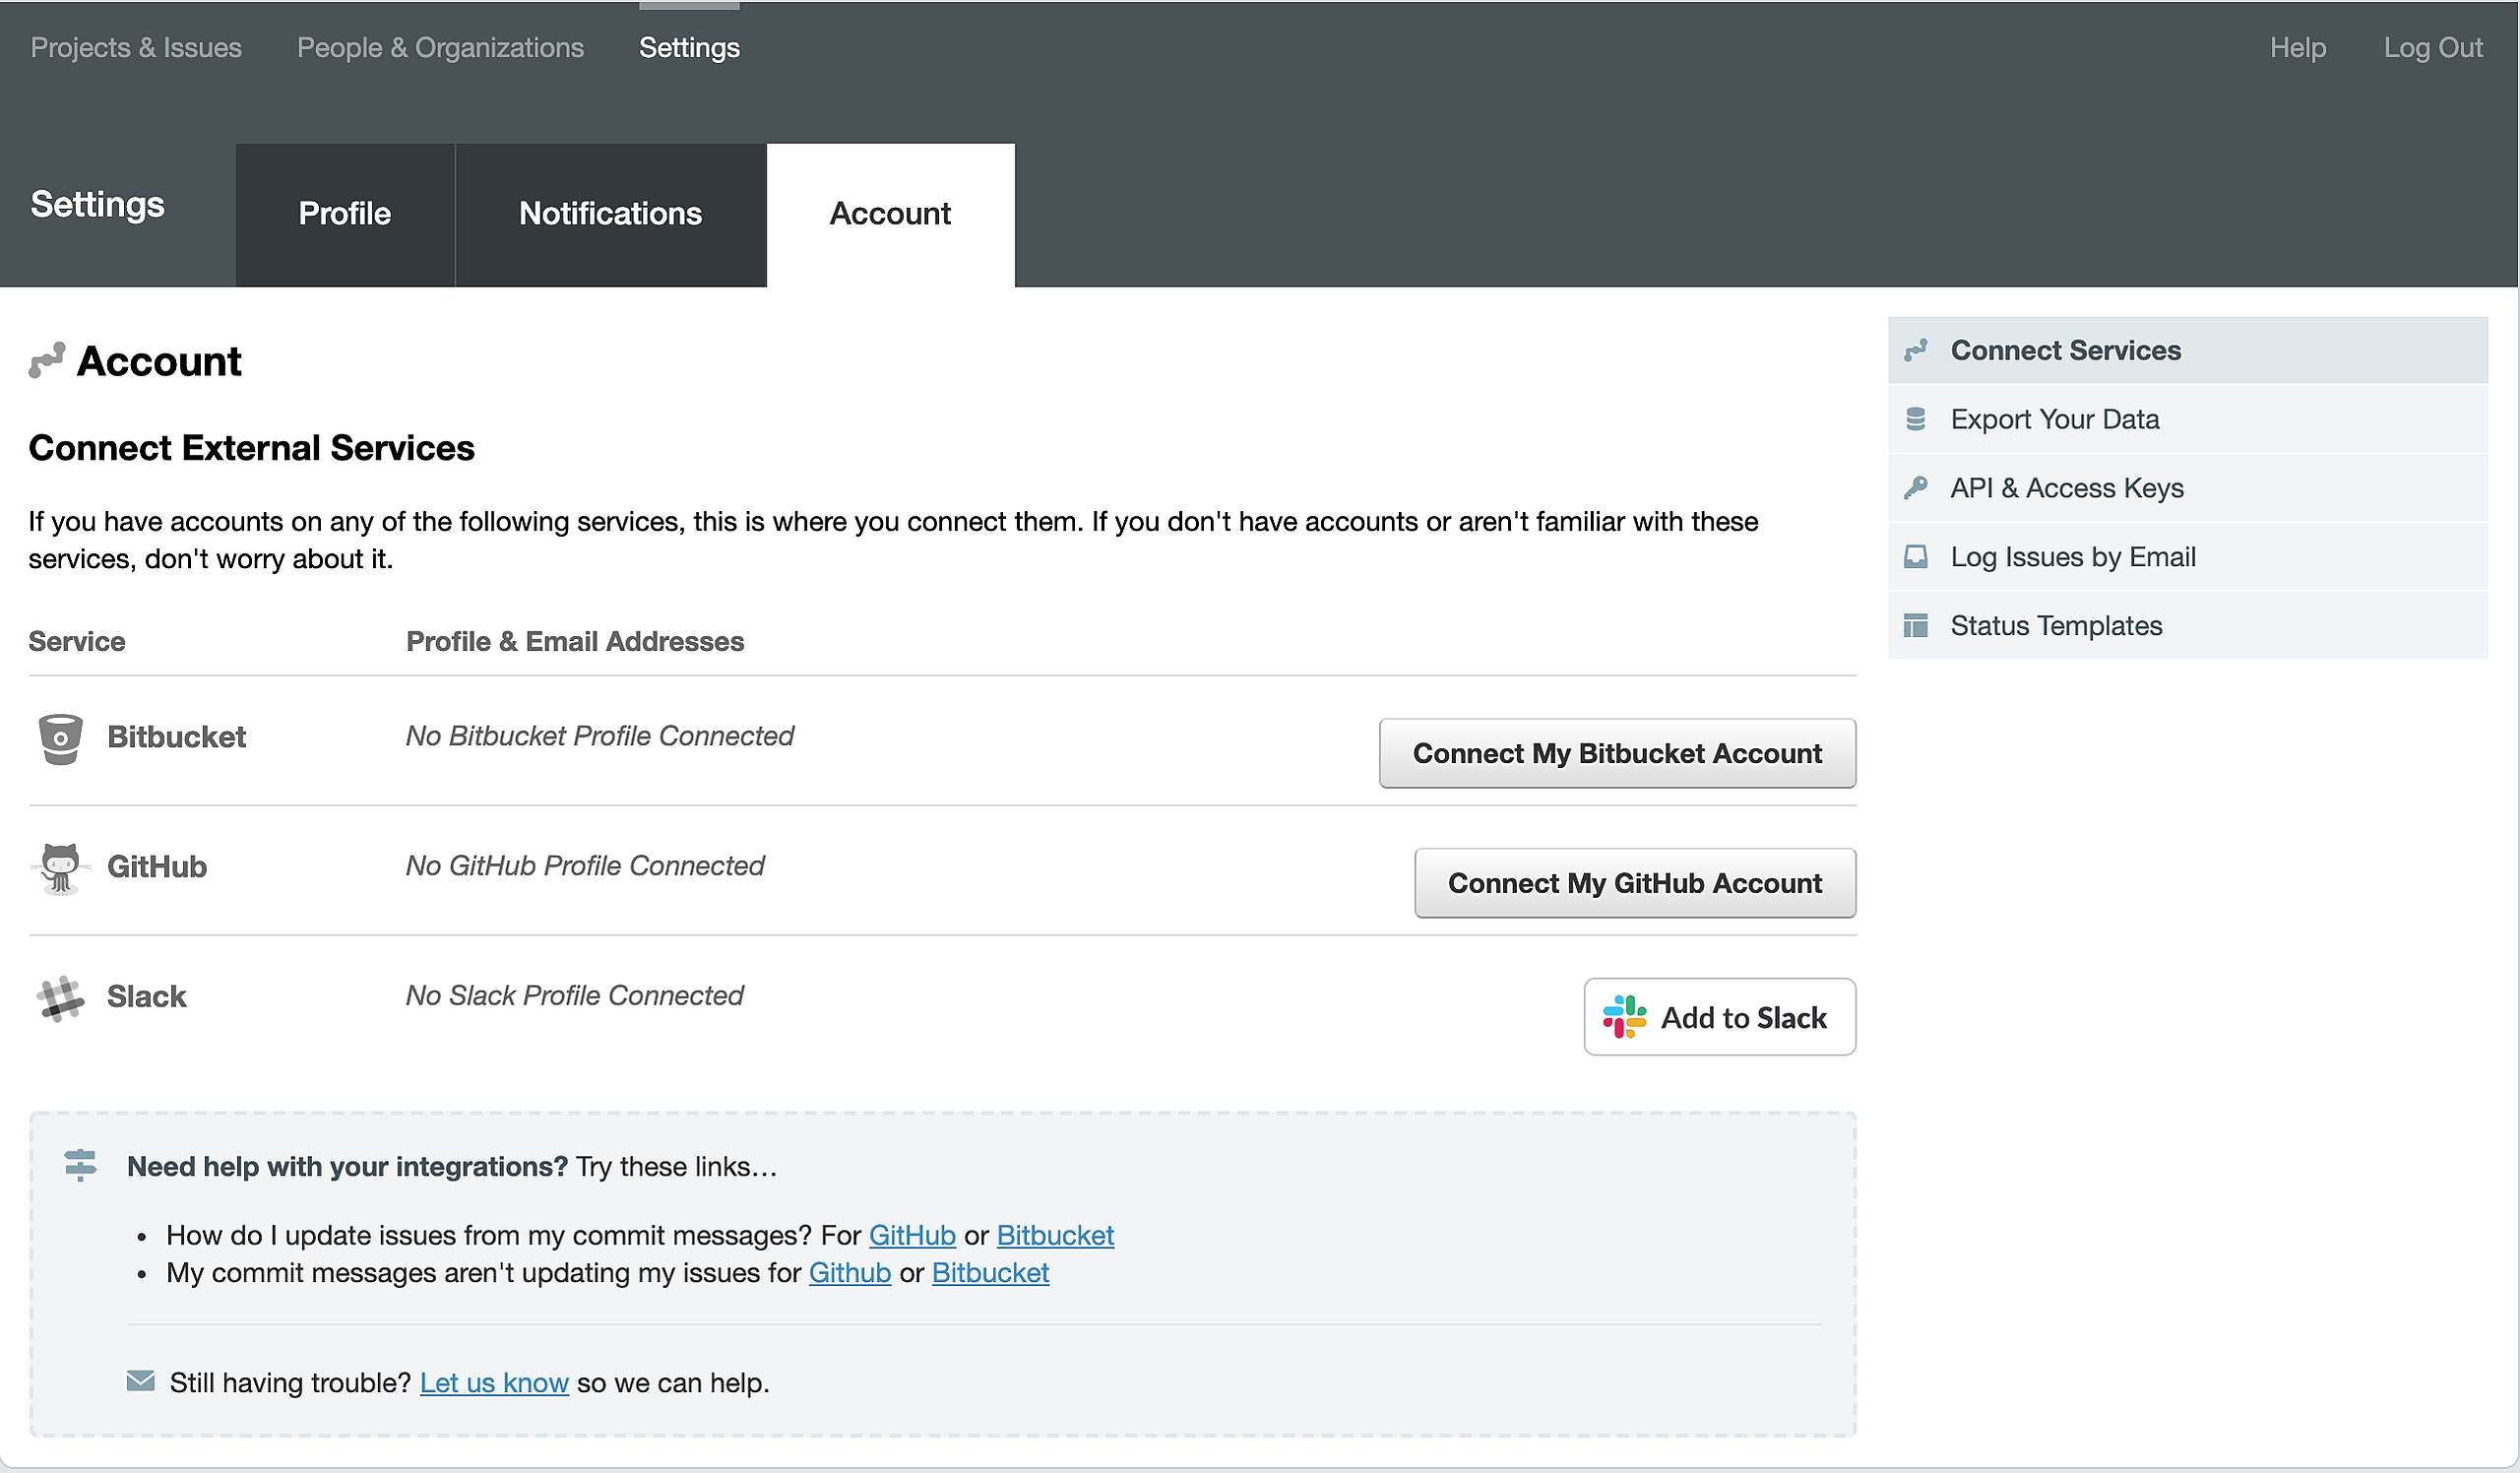
A few notes about who can connect your Sifter account to Slack:
You'll only need to connect Sifter to your Slack workspace once, but then any other user that wants to create issues from Slack should connect their Slack profile from their Sifter Account as described above.
Any Sifter user can connect their Sifter profile to their Slack profile, and any Sifter user can connect Sifter to a Slack workspace.
Users will only be able to create or edit issues for projects to which they've been given access, and they won't see any projects to which they don't have access as an option when they try to create a new issue.
How to Enable Notifications
You can configure issue notifications to post in relevant Slack channels on a per-project basis.
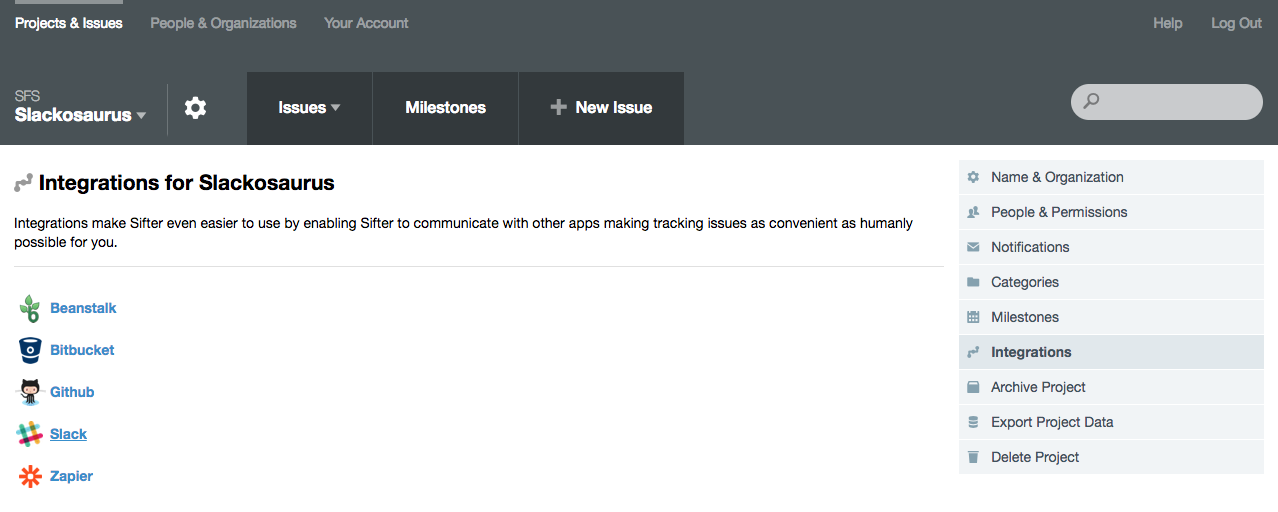
Navigate to the project you'd like to connect.
Click the gear icon next to the project name to view the Project Settings.
Click Integrations in the right sidebar on the Project Settings page.
Scroll down to the Slack area and follow the link to "Configure Slack Integration". Remember, you'll need to have connected your Sifter account to Slack following the instructions in the previous section first.
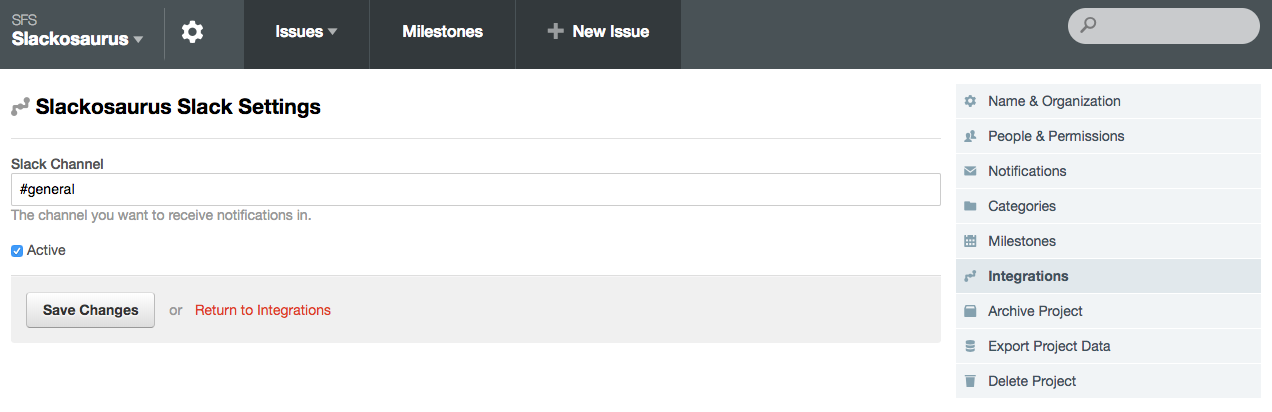
Enter the name of the Slack channel that you want notifications to show up in, including the # symbol.
A few notes about how the notifications work:
Only admins on a project can enable Slack notifications for that project.
Any person in the Slack channel to which notifications are posting will be able to see those notifications, even if they don't use Sifter.
Reconfiguring Notifications
If you’re using our old Slack integration, you'll want to reconfigure notifications with our new Slack App.
Navigate to the project you'd like to connect.
Click the gear icon next to the project name to view the Project Settings.
Click Integrations in the right sidebar on the Project Settings page.
You'll see your old notification setup there; you can delete this setting for now. Once you've connected to Slack as described in the first section, come back here and set up the notifications again (it's much easier than it used to be).
Don’t forget to delete the matching webhook integration in your Slack workspace. Nothing bad will happen if you forget, but we like to keep things tidy around here.
How to Create Issues from Slack
To add a Slack message to your Sifter project, hover over the message and choose the "..." option. Then select Create an issue and fill in the other details. That's it!
